

Whether it’s a red carpet interview you keep replaying or a viral performance clip you never want to lose, chances are there are plenty of celebrity videos online you would like to keep. Social platforms make these moments easy to watch, but videos can be removed, accounts can change, and saved posts may become difficult to find, meaning a favorite clip could disappear when you want to revisit it.
Fortunately, there is more than one way to save celebrity videos. In this guide, we’ll cover five practical methods, including built-in download options, online tools, screen recording, and professional video management tool for Mac or Windows, which keeps your video files local and helps you find specific scenes or spoken moments later.

Part 1. What to Know Before Saving Celebrity Videos
Before choosing a method of saving celebrity videos, check what the platform actually allows. A Save or Favorite button usually adds the post to an in-app collection, while a Download button may create a copy on your device. If the download option is unavailable, the uploader may have disabled it or the platform may restrict downloads for that type of content.
Whenever possible, use the platform’s official save or download feature and only keep videos you own or have permission to download. A video saved for personal viewing is still protected by copyright. This guide doesn’t cover leaked, private, or unauthorized material, including celebrity sex videos or celebrity porn videos, since saving or sharing such content can raise serious privacy, copyright, and platform-policy concerns. Downloading it does not automatically allow you to repost it, remove the watermark, edit it into new content, share copies, or use it for commercial purposes.
Part 2. Save Celebrity Videos Inside Social Media Apps
You can save celebrity videos together with the original posts, captions, and creator accounts by using the collection features built into each social media app. Instagram Saved Collections lets you place Reels and video posts in personal folders within the app instead of saving them on your Mac. TikTok offers a similar option through Favorites, while YouTube lets you add videos to Watch Later or create separate playlists.
This way, you can return to the celebrity videos you enjoy whenever you want without filling up your Mac or Windows storage. You can also create different collections or playlists for interviews, performances, red carpet appearances, behind-the-scenes clips, or individual celebrities.
Limitations:
- The videos stay on the original platform rather than being saved as local files on your Mac or Windows, so you must return to the relevant app or website and may also need an internet connection to watch them.
- If the creator deletes the original post, removes the account, changes the video’s visibility, or the platform takes the content down, you may no longer be able to view it.
- Collections and playlists can separate videos into groups, but they cannot search inside the clips by spoken dialogue, background, person, action, or specific scene.

Part 3. Save Celebrity Videos Using the Platform’s Download Option
You should be able to download some celebrity videos directly from the original platform, assuming the post is public, the video is available for download, and the uploader has allowed other users to save it. Since the download option is already built into the platform, you won’t need to install a separate tool.
TikTok
Go to the celebrity video you want to save and tap the arrow-shaped Share button. A row of sharing options will appear at the bottom of the screen. Tap Save Video, and the clip will be saved to your device, usually with the TikTok watermark included.
If you don’t see the Save Video option, it most likely means that the creator hasn’t shared the post publicly, has restricted its download permissions, or TikTok doesn’t offer the feature for that video or region.
Instagram allows eligible public Reels to be downloaded directly. Open the Reel, tap the Share icon, and select Download from the available options. The video will usually be saved to your device with the creator’s username and an Instagram watermark.
The same restrictions may apply when you download Instagram videos. If Download doesn’t appear, the Reel may come from a private account, the creator may have turned off downloads, or the feature may be unavailable for that post, account, or region.
YouTube
The simplest official way to save YouTube videos for offline viewing is to use YouTube Premium. Open the video you want to save, click Download below the video player or under the three-dot menu, and choose an available video quality. Once the download is complete, go to the Downloads section to watch it offline.
Keep in mind that platform downloads don’t all produce the same result:
- TikTok videos and eligible Instagram Reels may be saved as regular video files that you can later transfer to your Mac.
- YouTube downloads remain inside YouTube for offline playback and can’t be found as ordinary MP4 files in Finder, opened freely in another Mac app, or added directly to Clipto.
- The download button can be unavailable when the platform, country or region, account type, subscription, video eligibility, or uploader settings don’t support downloading.
Part 4. Save Celebrity Videos with Video Management Tool
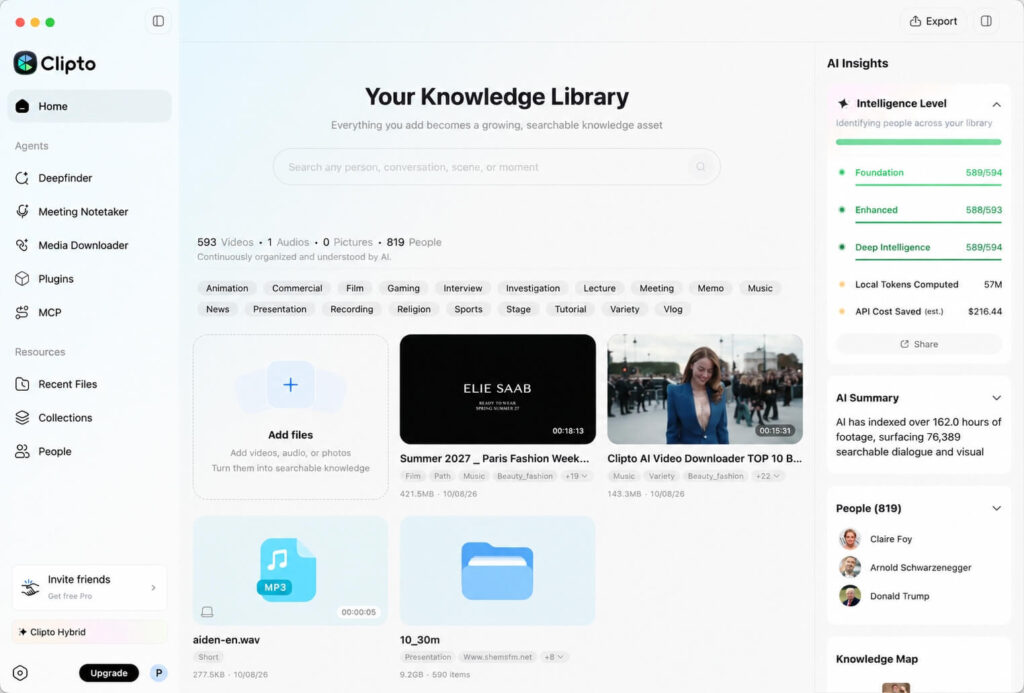
After legally saving celebrity videos or audio recordings to your Mac or Windows, you may eventually end up with a growing collection of files spread across different folders. Clipto video management tool organizes and searches the media already stored on your computer, making it easier to manage and locate specific content later.
1. Bring Your Local Media into Clipto
Import the videos and audio recordings you’ve already saved on your Mac or Windows, then arrange them in Clipto video management tool.
2. Analyze and Organize Your Files Automatically
Clipto’s Auto Tag feature automatically identifies and categorizes your local video and audio files with relevant tags, making it easier to organize large media libraries and find the content you need. Spend less time sorting files manually and more time focusing on editing, creating, and managing your content, all while keeping your media on your PC.
3. Search Any Clip in Videos Instantly
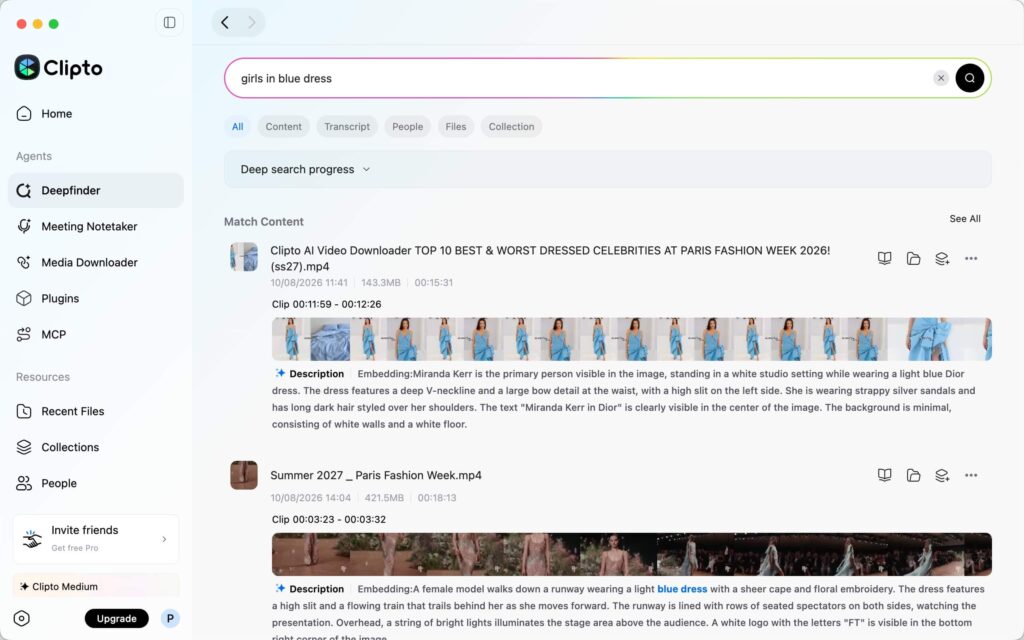
Search your local video library using everyday language. Simply describe the person, object, scene, or action you’re looking for, and Clipto helps you find matching moments across your footage, without manually scrubbing through videos or remembering file names.
Searches might include:
- “A celebrity walking onto the stage”
- “An actor standing in front of a blue background”
- “An interview filmed in a studio”
- “A singer performing under red lights”
- “A clip featuring a specific person”
Part 5. Save Celebrity Videos With an Online Video Downloader
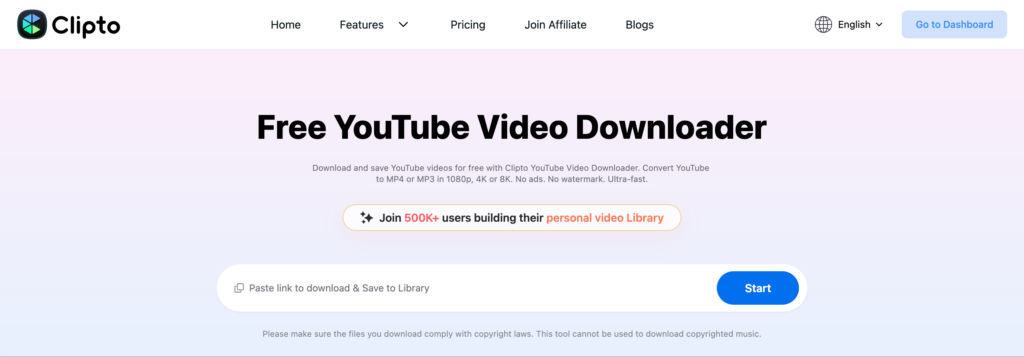
If you want to save a celebrity video using a process that doesn’t involve installing anything at all, an online video downloader is one of the simplest options, like Clipto Video Downloader. Most of these browser-based tools work in much the same way: copy and paste the video link, choose the format and quality, and download the file to your PC.
- Copy the video link: Open your web browser, find the celebrity video you want to download, and copy its URL from the address bar or sharing menu.
- Paste the link into the downloader: Return to the online video downloader and paste the copied URL into the input box. The tool will retrieve information about the video and display the available download options.
- Choose the quality and format: Select MP4 as the output format, then choose one of the available resolutions. MP4 is usually a practical choice because it offers a good balance between video quality and file size and can be played on most devices.
- Download the video: Click Download to finish the process of video download.
Online downloaders are simple to use, but they don’t usually offer as much control over file names, subtitles, formats, download history, or batch management as desktop software. These websites also change frequently, and some may contain intrusive ads, pop-ups, fake download buttons, trackers, or unsafe files, so don’t enter your platform login details, don’t grant unnecessary browser permissions, and don’t install any additional software promoted by the site.
Part 6. Save Celebrity Videos by Screen Record
If you only want to save a short celebrity interview, red carpet moment, or live performance clip, you can use the screen recording tools already built into your Mac or Windows. The Screenshot toolbar allows you to record the entire screen or a selected portion of it.
Mac
- Open the Screenshot toolbar: Press Shift + Command + 5 to open the screen capture toolbar.
- Choose the recording area: Select Record Entire Screen to capture everything visible on your display. Alternatively, select Record Selected Portion to capture only the area where the celebrity video is playing.
- Start the recording: Move the video to the point where you want the clip to begin. Select Record to start, then play the interview, performance, or event video.
- Stop the recording: When you’ve captured the section you want, select the Stop icon in the menu bar. Alternatively, press Command + Control + Esc to stop the recording.
- Find the recorded file: The recording is saved to your desktop by default. If you’ve chosen another location under Options, open that folder to find the
.movfile.
You can also open QuickTime Player, select File > New Screen Recording, and use the same Screenshot toolbar to record the entire screen or a selected portion. This method is most useful when you want to keep one short moment instead of saving the full video.
Windows
- Full screen: Press Windows + PrtScn to capture the entire screen.
- Selected area: Press Windows + Shift + S to select a specific area.
- Active window: Press Alt + PrtScn to capture the current window.
Screenshots are saved to the Pictures > Screenshots folder when using Windows + PrtScn. Other methods copy the screenshot to your clipboard, so you can paste it with Ctrl + V.
Conclusion
Once you’ve saved your favorite celebrity videos using one of the methods above, the next step is to keep them organized and easy to find. You could sort a small collection into folders on your Mac or Windows, or you could add a larger archive to Clipto video management tool for local analysis, automatic tags, and natural-language search. By keeping the files on your own device, you can return to specific interviews, performances, quotes, or scenes without depending on the original posts to remain online. If your collection is growing and you want a faster way to manage and search it, try Clipto video management tool and see how quickly you can find the exact moments you’re looking for.
FAQs
How can I save celebrity videos to my Mac?
Use the platform’s official download option, an online video downloader, or the screen recording tools built into macOS. Downloaded files usually appear in the Downloads folder unless you select another location. Only keep content you own or have permission to download, and don’t save leaked, private, or unauthorized material, including celebrity sex videos or celebrity porn videos.
Can I download celebrity videos from Instagram?
Eligible public Reels may include a Download option. Open the Reel, tap Share, and select Download to save it to your device. If the option doesn’t appear, the creator may have disabled downloads, the account may be private, or the feature may be unavailable for that video or region. Tapping Save only adds the Reel to Instagram Saved and won’t create a local file on your Mac.
Can I save a celebrity video from TikTok?
Open the TikTok app and find the video you’d like to keep. Tap Share, then select Save Video. If Save Video isn’t listed, the creator hasn’t allowed downloads for that post; in that case, add it to Favorites or keep the original link instead.
How can I find a specific moment inside a saved video?
Add the folder containing your videos to Clipto Mac, then describe the moment in plain English, such as “interview with a blue backdrop” or “singer walking onto the stage.” Clipto searches the visuals, spoken dialogue, people, actions, objects, locations, and scenes, then takes you directly to the matching video and timestamp.
Does Clipto upload my videos to the cloud?
No. Clipto Mac analyzes and indexes your media locally on the device. Your files can remain in local folders, external drives, cloud-synced directories, or a NAS, and Clipto doesn’t require you to upload the video library to its cloud before searching it.